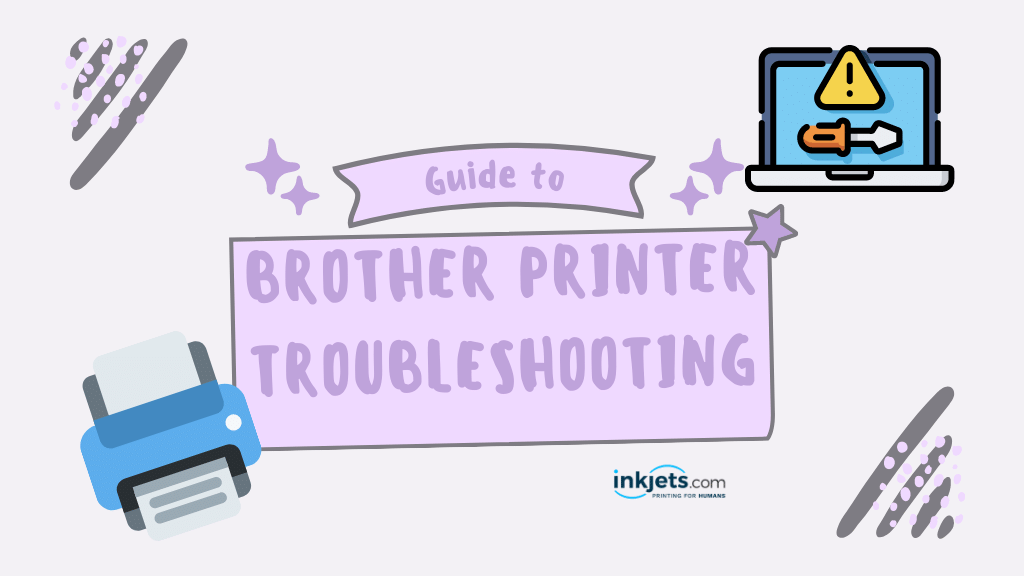
Introduction to Brother printers
The domain of printing technology has witnessed impressive leaps and bounds over the decades, growing from rudimentary woodblock printing to the sophisticated digital printers we encounter today.
One brand that has consistently stood out in the realm of digital printing solutions is Brother Industries.
Synonymous with high-quality, performance, and reliability, Brother printers have earned a revered spot in both commercial and personal spaces. Whether it's their award-winning laser printers, the compact and versatile inkjet printers, or their pioneering range of multi-function devices, Brother printers encapsulate a unique fusion of innovation, efficiency, and durability.
We will explain how to perform Brother Printer troubleshooting in this article so that you can easily resolve Brother printer drivers and other software or hardware-related errors.

Troubleshooting Common Brother Printer Issues
PAPER JAMS AND HOW TO PREVENT THEM
Dealing with paper jams on a Brother printer can be frustrating, but here's a step-by-step guide to help you resolve and prevent paper jams:
Step 1: Power Off the Printer
If a paper jam occurs, the first step is to power off the printer. This ensures your safety and prevents any further damage to the printer or injury to yourself.
Step 2: Locate the Jammed Paper
Open the printer cover or front panel and carefully locate the jammed paper. It may be visible in the paper feed area, output tray, or any other accessible parts of the printer. Take note of the paper's location and how it is stuck.
Step 3: Gently Remove the Jammed Paper
Hold the jammed paper firmly with both hands and pull it out slowly and carefully in the direction of the paper path. Avoid tearing the paper while removing it. If the paper is stuck and difficult to remove, refer to the printer's manual or Brother's support website for specific instructions on releasing paper jams for your model.
Step 4: Check for Residual Paper
After removing the jammed paper, check for any small pieces or scraps that may have been left behind. These remnants can cause subsequent paper jams if not removed. Use a flashlight if necessary to check all visible areas and access points of the printer for any remaining paper fragments.
Step 5: Reload the Paper Tray
If you had to remove the paper tray to clear the jam, make sure to reinsert it correctly and align the paper properly. Improperly loaded or misaligned paper can lead to future paper jams.
Step 6: Verify Paper Type and Quality
Ensure that you are using the appropriate type and quality of paper recommended by Brother for your specific printer model. Using paper that is too thick, too thin, or of poor quality can increase the likelihood of paper jams. Follow the paper guidelines provided by Brother to ensure compatibility.
Step 7: Fan and Align Paper
Before loading paper into the tray, fan the stack to separate the sheets and prevent them from sticking together. Align the edges of the paper stack to ensure it sits straight and flat in the paper tray.
Step 8: Adjust Paper Guides
Adjust the paper guides in the paper tray to snugly hold the paper in place without being too tight. Ensure the guides are properly aligned with the paper size to prevent misfeeds and jams.
Step 9: Avoid Overfilling the Paper Tray
Do not overload the paper tray beyond its capacity. Overfilling can cause the paper to jam as it may not feed properly or may put excess pressure on the paper path. Follow the recommended paper capacity guidelines provided by Brother.
Step 10: Perform Regular Maintenance
To prevent paper jams, perform regular maintenance on your Brother printer. This includes cleaning the paper feed rollers and keeping the printer clean from dust and debris. Refer to the printer's manual or Brother's support website for specific maintenance instructions for your model.
By following these steps and practicing good printer maintenance habits, you can resolve and prevent paper jams on your Brother printer, ensuring smooth and uninterrupted printing operations.
PRINT QUALITY ISSUES AND POTENTIAL SOLUTIONS
Common print quality issues with Brother printers can arise from various factors. Here are some common issues and steps to resolve them:
1. Faded Prints:
- Check the ink or toner levels. Replace or refill cartridges if necessary.
- Adjust print settings to increase print density or quality.
- Clean the printheads or toner drums to remove any clogs or debris.
- Ensure the print media is suitable for the printer and in good condition.
2. Blurry or Smudged Prints:
- Ensure the print media is compatible with the printer and is not too thick or textured.
- Check the print settings for quality and resolution.
- Clean the printheads or toner drum to remove any debris or excess toner.
- Adjust the paper type or media settings to match the actual paper being used.
3. Uneven or Patchy Prints:
- Clean the printheads or toner drums to remove any debris or buildup.
- Calibrate the printer to ensure accurate color reproduction.
- Check for any damage or wear on the printheads or toner drum and replace if necessary.
- Ensure the paper is properly loaded and aligned in the tray.
4. Ghosting or Double Imaging:
- Check the print settings and make sure the correct paper type is selected.
- Replace or clean the imaging drum or transfer belt, if applicable.
- Ensure the printer is placed on a stable surface and not subjected to vibrations.
- Check for any damaged or worn parts and replace them if necessary.
5. Paper Jams:
- Remove any jammed paper carefully, following the printer's manual or instructions.
- Check the paper tray for proper alignment and adjust the paper guides.
- Ensure the paper is not too thick or wrinkled and is within the recommended specifications.
- Clean the paper feed rollers to ensure proper feeding.
6. Streaks or Lines on Prints:
- Clean the printheads or toner drum to remove any debris or excess toner.
- Check for any damaged or worn parts and replace them if necessary.
- Run a printer self-cleaning or maintenance cycle if available.
- Align the printheads or perform a calibration, if applicable.
7. Color Inconsistencies:
- Check the color settings and ensure they are accurately configured.
- Calibrate the printer to ensure consistent color reproduction.
- Use high-quality ink or toner cartridges that are compatible with the printer.
- Replace any empty or low ink or toner cartridges.
Remember to consult the printer's manual or Brother's support resources for model-specific troubleshooting steps and guidance.
Regular printer maintenance, proper usage of consumables, and using compatible print media can help prevent and resolve many print quality issues.
CONNECTIVITY PROBLEMS
Common connectivity problems with Brother printers can be frustrating, but here are some common issues and step-by-step guides to resolve them:
1. Printer Not Detected on the Network
Step 1: Check Network Connection:
- Ensure the printer is connected to the network properly, either via Ethernet or Wi-Fi.
- Verify that the network cables are securely connected and that the Wi-Fi connection is stable.
Step 2: Restart Devices:
- Power off the printer, computer, and router.
- Wait for a few minutes, then power them on again in the following order: router, printer, computer.
Step 3: Check IP Address:
- Print a network configuration page from the printer to confirm its IP address.
- Ensure the IP address matches the network subnet and gateway settings.
Step 4: Configure Firewall/Antivirus Settings:
- Temporarily disable the firewall or antivirus software on your computer.
- Attempt to connect to the printer again. If successful, adjust the settings of your security software to allow printer communication.
Step 5: Reinstall Printer Drivers:
- Uninstall the printer drivers from your computer.
- Download and reinstall the latest drivers from the Brother website that match your printer model and operating system.
- Follow the installation wizard to complete the process and reconnect to the printer.
2. Unable to Print Wirelessly
Step 1: Verify Wi-Fi Connection:
- Ensure that the printer is connected to the same Wi-Fi network as the computer.
- Check the Wi-Fi signal strength and move the printer closer to the router if necessary.
Step 2: Restart Devices:
- Power off the printer, computer, and router.
- Wait for a few minutes, then power them on again in the following order: router, printer, computer.
Step 3: Reconnect to Wi-Fi Network:
- Access the printer's settings or control panel to reconnect to the Wi-Fi network.
- Enter the Wi-Fi network name (SSID) and password, if prompted.
- Follow the prompts to complete the connection process.
Step 4: Check Printer and Computer Connectivity:
- On the computer, open the Control Panel or System Preferences and navigate to the Printers and Scanners settings.
- Remove the Brother printer from the list of printers.
- Add the printer again, ensuring it is detected on the network and selected as the default printer.
Step 5: Update Firmware:
- Check the Brother website for firmware updates for your printer model.
- Download and install the latest firmware version following the provided instructions.
- Restart the printer and attempt to print wirelessly again.
3. Mobile Device Cannot Connect to the Printer
Step 1: Check Mobile Device Connectivity:
- Ensure that the mobile device is connected to the same Wi-Fi network as the printer.
- Check the Wi-Fi signal strength on the mobile device.
Step 2: Install Brother Printer App:
- Install the official Brother printer app on your mobile device from the app store.
- Open the app and follow the setup wizard to detect and connect to the printer.
- Make sure to grant the necessary permissions for the app to access the printer and device.
Step 3: Verify Printer Sharing Settings:
- On the printer, check the sharing settings to ensure it is set to allow connections from mobile devices.
- Refer to the printer's manual or Brother's support resources for instructions on adjusting the sharing settings.
Step 4: Restart Devices:
- Power off the mobile device, printer, and router.
- Wait for a few minutes, then power them on again in the following order: router, printer, mobile device.
Step 5: Troubleshoot Connection:
- If the issue persists, consult the printer's manual or Brother's support resources for specific troubleshooting steps for your printer model and mobile device.
It's important to note that the exact steps may vary depending on your Brother printer model and the specific connectivity issue you're experiencing. For detailed instructions and model-specific troubleshooting, refer to the printer's manual or consult Brother's support website.
INK OR TONER ISSUES
Brother printers, like many other brands, can sometimes encounter issues with their ink and toner.
Here are a few common problems along with step-by-step guides on how to resolve them.
1. Low ink or toner warning
Even if your printer is printing just fine, it may send a warning that the ink or toner levels are low.
This is often just a precaution, but it's worth checking to ensure you don't run out during an important print job.
Solution - Purchase new ink or toner cartridges from a trusted supplier. Make sure you buy the correct type for your specific Brother printer model.
Once you have the new cartridges, follow the instructions in your printer's manual to replace the old ones.
2. Poor print quality
If your printed documents are coming out streaky, faded, or with incorrect colors, it could be due to issues with the ink or toner.
Solution
Step 1: Check your ink or toner levels. If they're low, replace the cartridges.
Step 2: If your cartridges are full, run a cleaning cycle on your printer. This can often be done from the printer's control panel, but consult your manual if you're unsure.
Step 3: If the problem persists, it might be due to a faulty or old cartridge. Try replacing it with a new one.
3. Printer doesn’t recognize the cartridge
Sometimes, even when you install a new cartridge, the printer might not recognize it and continue to display a "no cartridge installed" error.
Solution
Step 1: Ensure you are using the correct cartridge for your printer model.
Step 2: Remove the cartridge and check for any protective strips or covers that were supposed to be removed.
Step 3: Clean the cartridge contacts and the corresponding contacts in the printer using a lint-free cloth.
Step 4: Reinstall the cartridge and restart the printer.
Step 5: If the problem persists, the cartridge might be faulty. Replace it with a new one.
4. Toner dries quickly
If you feel like you're having to replace your toner cartridges more often than you should, you might not be using your toner efficiently.
Solution
Try to use the "draft" or "low quality" print setting when possible, as this uses less toner. Also, make sure your printer is properly calibrated, as incorrect settings can lead to unnecessary toner use.
Read: Help! Why Does My Printer Run Out of Ink So Quickly?
5. Toner smear
If toner ink is smearing on your printed documents, it could be due to a variety of issues.
Solution
Step 1: If the toner cartridge is new, check if it's installed correctly.
Step 2: If the toner is old or nearing the end of its life, replace it with a new one.
Step 3: Check your printer's fuser. If it's not heating properly, it won't bond the toner to the paper, which can lead to smearing. Depending on the model, you might be able to replace the fuser yourself, or you may need to take your printer to a professional.
Always refer to your printer's user manual for specific instructions. If these solutions don't resolve your issue, you may need to contact Brother's customer support or a professional printer repair service.
SCANNING AND FAXING ISSUES
Brother printers are generally reliable, but like any technology, they can run into issues from time to time. Here are some common scanning and faxing problems you might encounter, along with step-by-step solutions.
1. The scanner doesn't work - If you're having trouble scanning, it could be due to several issues, including connection problems, software issues, or hardware faults.
Solution
Step 1: Check your connection. If you're scanning over a network, make sure your printer and computer are both connected to the same network. If you're using a USB connection, try a different USB port or cable.
Step 2: Update your drivers. Visit Brother's website, find the latest drivers for your printer model, and install them.
Step 3: Check if the scanner glass is clean. Dirty scanner glass can cause issues. Clean it with a soft, lint-free cloth.
Step 4: If all else fails, try power cycling your printer (turning it off, waiting a few seconds, and then turning it back on).
2. Poor scan quality - If your scans are coming out blurry, streaky, or with incorrect colors, there could be a few different causes.
Solution
Step 1: Clean your scanner glass. Even small specks of dust or debris can cause issues with scan quality.
Step 2: Check your scan settings. You might be using too low a resolution, or the wrong color or format settings.
Step 3: If the problem persists, it could be a hardware issue. Contact Brother's customer support or a professional printer repair service.
3. Faxing doesn't work - If you're unable to send or receive faxes, it could be due to a problem with your phone line, settings, or the printer itself.
Solution
Step 1: Check your phone line. Make sure it's properly connected to both the printer and the wall jack. If possible, try using a different line.
Step 2: Check your fax settings. Make sure you've dialed the correct number, and that you've set your printer to the correct mode (send or receive).
Step 3: If you're trying to send a fax and it's not working, try receiving one instead. This can help you determine if the problem is with sending, receiving, or both.
Step 4: Power cycle your printer and, if the problem persists, contact Brother's customer support.
Remember, for the most accurate information, you should always consult your printer's user manual or Brother's customer support. These steps should resolve most issues, but if they don't, it may be time to consult a professional.
Popular Brother Printer Models at a Glance
Do take note that the descriptions we have here are general overviews, and that specific features may vary depending on the model and usage conditions.
| Model | Description |
|---|---|
| Brother HL-L2300D | An affordable, compact laser printer designed for personal or home office use. It features fast printing at up to 27ppm, automatic duplex printing, and a manual feed slot for various paper sizes. |
| Brother MFC-L2710DW | A compact, all-in-one laser printer that's perfect for small offices or home offices. It provides high-quality printing and copying at up to 32ppm, faxing, color scanning, and automatic duplex printing. |
| Brother HL-L8360CDW | A robust color laser printer with high-quality print output. It features fast printing at up to 33ppm, color and black, automatic duplex printing, and versatile connectivity options. |
| Brother MFC-J995DW | An all-in-one inkjet printer designed for small businesses or home offices. It features INKvestment Tank cartridges to deliver high page yield, and flexible printing options for various paper sizes and types. |
Key features of Brother laser printers
Brother laser printers bring together a blend of speed, quality, efficiency, and versatility, making them a popular choice for both personal and professional use.
| Feature | Description |
|---|---|
| High Print Speed | Brother printers often offer high print speeds, allowing for quick and efficient printing especially beneficial in high-volume printing environments. |
| Automatic Duplex Printing | Many Brother printers come with the capability to automatically print on both sides of the paper, reducing paper use and simplifying the process of producing double-sided documents. |
| Versatile Connectivity | Brother printers usually provide versatile connectivity options including Wi-Fi, Ethernet, and sometimes NFC. This allows easy printing from various devices and across multiple platforms. |
| INKvestment Tank Technology | Featured in some Brother inkjet printers, this technology uses reengineered ink cartridges to hold more ink and work in conjunction with an internal ink storage tank to deliver more pages of uninterrupted printing without sacrificing the compact size. |
| Multi-Function Capabilities | Brother offers many All-in-One printers (also called Multi-Function Printers) that can print, scan, copy, and sometimes fax. This makes them a space-saving and cost-effective solution for home offices or businesses. |
Using Brother Customer Support

WARRANTY AND SERVICES
Using the warranty and services of Brother printers can help you resolve issues that may arise with your printer. The process may vary depending on your location and the specific model of your Brother printer. Here is a general, step-by-step guide on how to use these services:
1. Check the Warranty Status - Before you proceed, make sure your printer is still under warranty. This information can usually be found in the product documentation provided when you purchased your Brother printer. You can also check it online on the Brother website by entering your printer's model number and serial number. Keep in mind that warranties typically cover manufacturing defects and not problems arising from misuse or normal wear and tear.
2. Find the Problem - Identify the specific issue with your printer. This will be useful when you contact Brother's customer support and it can also help you determine whether the problem is covered by the warranty.
3. Contact Brother Support - If your printer is still under warranty and the problem is covered, your next step is to contact Brother's customer support. You can do this via their website, phone, or live chat. Provide them with all necessary information, including the printer model, serial number, and a description of the issue. They will guide you through some troubleshooting steps.
4. Service Request - If the issue can't be resolved through troubleshooting, Brother will initiate a service request. Depending on the terms of your warranty, they may arrange for repair, replacement, or servicing of the printer.
5. Prepare Your Printer for Servicing - If your printer needs to be sent in for servicing, make sure you follow Brother's instructions carefully. This usually includes packing the printer properly to prevent damage during transport. Remove ink or toner cartridges and any paper in the machine unless instructed otherwise.
6. Servicing or Replacement - Brother's authorized service center will then repair your printer or replace it, depending on the warranty terms and the nature of the issue.
Remember, it's important to register your product after purchase, as it can make the warranty claim process smoother. Keep your purchase receipt and warranty card in a safe place, as you may need them when making a warranty claim.
Please note that the process may vary, so it's always a good idea to check your product manual or the Brother website for specific instructions related to your printer model and location.
USING BROTHER’S ONLINE HELP AND SUPPORT CENTER
The Brother Online Help and Support Center is a comprehensive resource for troubleshooting issues, finding answers to common questions, and getting assistance with your Brother products. Here is a step-by-step guide on how to use it:
1. Access the Brother Online Support Center - Open your web browser and visit the Brother Online Support Center. The URL can vary depending on your location, but generally, it's found at: https://support.brother.com/
2. Select Your Region - The website may ask you to select your region or country. This is because product models and support options can vary between regions. Choose your appropriate location.
3. Enter Your Product Details - You'll find a search box usually labeled as "Search by Model Name". Here, enter your product's model number (e.g., HL-L2380DW). This information can typically be found on the printer itself or in the product documentation. After entering the model name, press Enter or click on the Search icon.
4. Access Product Support - After searching, you'll be directed to a page dedicated to your product. Here you'll find a variety of resources including manuals, FAQs, drivers, software updates, and more.
5. Select the Appropriate resource - Depending on the problem you're experiencing, you may want to download the latest drivers, read the FAQ, or access the product manual. If you're looking to troubleshoot a problem, the FAQs can be especially helpful, as they cover common issues and how to resolve them.
6. Contact Support - If you can't find the information you need, you can contact Brother's customer support directly. Depending on your region, you may have options to contact them via phone, email, or live chat. The "Contact Us" option is usually found at the bottom of the page.
Remember to have your product details at hand when contacting support, including the model number and any specific error messages or issues you're encountering. This will help the support team assist you more efficiently.
HOW TO CONTACT BROTHER CUSTOMER SERVICE
If you're unable to solve an issue with your Brother printer through the self-help resources on the Brother Online Help and Support Center, your next step should be to contact Brother's customer service directly. Here's a step-by-step guide:
1. Prepare Your Information - Before reaching out to Brother's customer service, prepare the necessary information. This includes your printer's model number, serial number, and a detailed description of the problem you're experiencing. If there are any error codes or messages, write those down as well.
2. Visit the Brother Support Website - Open your web browser and navigate to the Brother Support website: https://support.brother.com/
3. Select Your Country or Region - If prompted, select your country or region from the provided list. This is because the support services may vary depending on your location.
4. Navigate to the Contact Us Page - You can usually find the "Contact Us" page link at the bottom of the Brother Support website, or in the website's main menu. Click on it.
5. Choose Your Contact Method - Depending on your location, you'll usually be provided with several ways to contact Brother, including:
- Phone - You'll be given a phone number that you can call for support. Business hours will usually be listed.
- Email - You can send an email detailing your problem. You'll usually be given a form to fill out with your contact information, product details, and description of the problem.
- Live Chat - Some regions offer live chat support. If available, you'll see a "Chat Now" button. Click it to start a chat session with a support representative.
6. Contact Brother Support - Once you've chosen your preferred method, contact Brother's support and provide them with the information you prepared in step 1. They will then guide you through the troubleshooting process, provide solutions, or instruct you on how to use your warranty if the issue is covered.
Remember that response times may vary based on the method of contact and the time of day. You might need to be patient, especially during peak hours. It can also be helpful to have your printer close by when you contact support, in case they need you to perform troubleshooting steps.