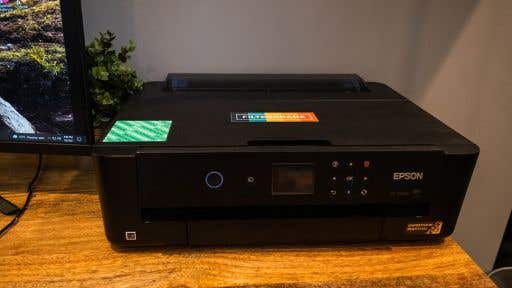
Epson printers are renowned for being user-friendly
and easily accessible.
Nevertheless, printing problems are unavoidable.
You are aware of how difficult it is to address common
printer issues without a guide.
The purpose of this guide is to educate you how to utilize
your printer and cartridges in an efficient manner.
We have included the most frequently asked questions
regarding Epson printer issues and answers.
This Epson printer troubleshooting guide
can serve as your manual for resolving
common printer issues.
Epson Printer Issues and How to Fix Them

How can I diagnose issues with my Epson printer?
Fixing common printer issues can save you time and money.
Users of Epson printers typically need assistance connecting
their device to a computer or printing.
1. Epson printer NOT printing
- Ensure that your printer is turned on.
- Verify that the computer's cord is correctly connected to your Epson printer.
- Check if the devices are connected to the same network when using wifi.
- Examine the ink levels and paper jams.
- A blinking ink out indicator indicates low ink. Install or refill new ink.
- If the paper out indicator is lit, load additional paper.
- For paper jams, remove the paper from the printer with care.
- Remove remaining components carefully.
- Reboot the computer and the printer.
- If your Epson printer still won't print, contact your dealer or a specialist.
2. Epson printer is offline
Does your Epson printer not produce any output?
Another likely explanation is that the printer is down.
Incorrect cable connection or system error may
be to blame.
It may be caused by a paper jam or a printing
work that has been paused.
3. Connecting your Epson printer to WiFi
- Turn your Epson printer on. Ensure that your Epson printer has the most recent driver update.
- Tap the Home button on the control panel of the printer.
- Choose WiFi Setup. Select OK.
- Choose WiFi Setup Assistant. Select OK.
- It will now look for a network that is available.
- Choose your network connection and input its password.
- Wait until the installation is finished. Select OK.
- It should now connect to your wifi successfully.
4. Connecting your Epson printer to a computer
- Start up your Epson printer.
- Download and install the appropriate Epson driver software for your Windows operating system.
- Check the conditions in the box labeled License Agreement. Select Next.
- Select Install.
- Choose your Epson product, and then click Next.
- Choose Printer Registration, and then click Next.
- Choose Accept, then click Next.
- Register your printer with the Epson Connect service. Click Accept.
- Create an account or sign in if you already have one.
- Select Close.
5. Resetting your Epson printer
- Make sure you turn your Epson printer off.
- Locate the printer's reset button on its rear panel.
- With a pin, press and hold the reset button.
- Hold the reset button for 5 seconds while turning on the printer.
- The printer will print a notification page. Let go of the reset button.
- Your printer will print the default IP address after a few seconds.
- Reconfigure the printer using the IP address that was printed.


