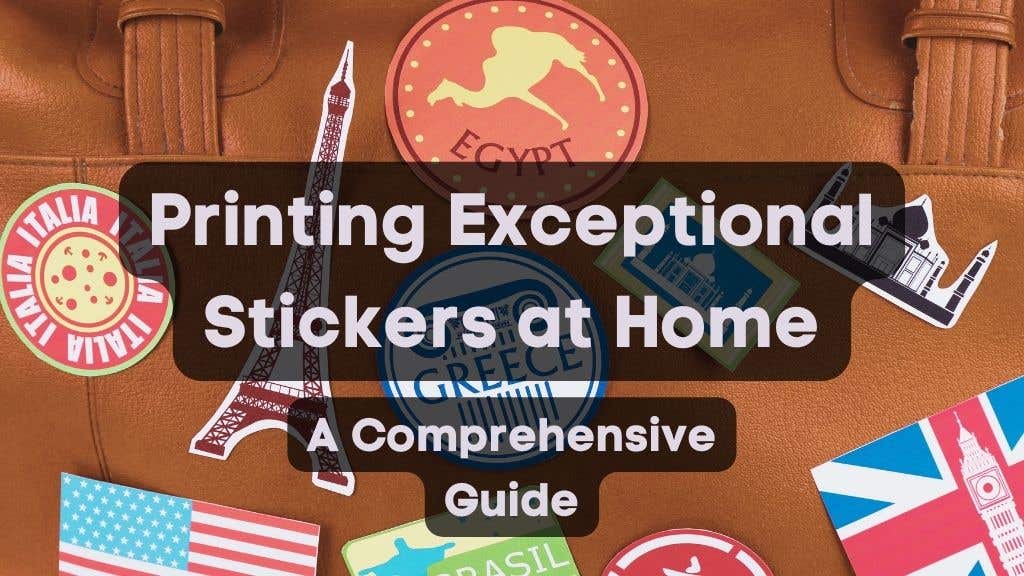
Stickers have become an integral part of our daily lives, offering a wide range of applications from personal expression to promotional activities.
In this digital age, printing stickers has evolved into a fascinating and versatile art form.
Whether you're an artist, a business owner, or simply a sticker enthusiast, understanding the intricacies of sticker printing can help you unleash your creativity and achieve remarkable results.
This guide will provide an extensive walkthrough of how you can print high-quality stickers at home, including recommendations for materials, design tips, and step-by-step instructions for the printing process.
The Evolution of Stickers
Stickers have a rich history that dates back to ancient civilizations, where they were used for practical purposes such as labeling and sealing documents.
However, it was in the 20th century that stickers gained popularity in various forms of self-expression and communication.
From political campaigns to the vibrant subculture of skateboarding, stickers became a powerful means of personal and collective identity.
In recent years, the digital revolution has given rise to a new wave of sticker culture. Digital stickers, often referred to as emojis or emoticons, have become a ubiquitous form of communication in messaging apps and social media platforms.
This modern twist on stickers has opened up a whole new realm of creativity, allowing users to express emotions, ideas, and humor in a visually engaging way.
Materials You'll Need
To print stickers at home, you will need some essential tools and materials:
1. Graphic Design Software

Here are several graphic design software programs that are suitable for designing and printing stickers at home:
1. Adobe Illustrator -This is a professional vector graphics editor, perfect for designing stickers as it allows for infinite scaling without loss of quality. Illustrator's robust features allow you to create anything from simple designs to complex illustrations. While it's a subscription-based service, it's worth the investment if you plan on designing regularly.
2. Adobe Photoshop - Known for photo editing, Photoshop is also great for creating sticker designs. It works on a pixel-based format, making it suitable for detailed and complex designs. Just like Illustrator, Photoshop is also a subscription-based service.
3. Canva - Canva is a web-based design tool that is very user-friendly and perfect for beginners. It offers a variety of templates, including ones for stickers. While it has a free version with plenty of features, Canva also offers a Pro subscription with more advanced tools and a wider range of assets.
4. GIMP (GNU Image Manipulation Program) - This is a free and open-source raster graphics editor, useful for tasks such as photo retouching, image composition, and image authoring. It's a great alternative to Adobe Photoshop if you're looking for a cost-free option.
5. Inkscape - This is a free and open-source vector graphics editor, similar to Adobe Illustrator. It has many advanced features and allows for flexible drawing tools and broad file format compatibility, making it a good option for sticker design.
6. Cricut Design Space - If you're using a Cricut cutting machine to cut your stickers, their proprietary software, Cricut Design Space, is an excellent tool for designing stickers. It's user-friendly and offers plenty of pre-made designs.
7. Silhouette Studio - Similar to Cricut Design Space, this software is designed to be used with the Silhouette line of cutting machines. It offers powerful design tools and is easy to use.
8. CorelDRAW - This is a vector graphics editor like Adobe Illustrator. It's highly regarded in the design community for its powerful features. It's available as a one-time purchase, unlike Adobe's subscription model.
Remember, the best software for you will depend on your comfort level with design programs, your budget, and specific design needs. Most of these programs offer trial periods, so you can try them out to see which one you prefer.
2. Printer and of course, printer ink

A good-quality inkjet or laser printer can produce excellent results. Inkjet printers are generally better for sticker printing as they mix colors more precisely.
However, laser printers can also work well and are especially good if you plan to create waterproof stickers. Finding the right budget printer for sticker printing will largely depend on your specific needs.
Here are a few well-regarded options, each with their own strengths:
1. HP DeskJet 2755 - This all-in-one printer offers wireless printing and an easy setup process, which is perfect for beginners. While not specifically designed for stickers, its print quality is more than sufficient for most personal uses. It uses HP's high-quality ink cartridges and has mobile printing capabilities.
2. Canon PIXMA MG3620 - This model is another all-in-one printer that offers high-quality prints with a resolutionup to 4800 x 1200 dpi. It has wireless capability and supports mobile printing through the Canon PRINT app, Google Cloud Print, and AirPrint. It also supports borderless printing, which can be particularly useful for sticker printing.
3. Epson Expression Home XP-4100 - This compact, all-in-one printer offers a high resolution of up to 5760 x 1440 dpi. It has wireless printing capabilities, and with individual ink cartridges, you only need to replace the color you need.
This Epson model can handle a variety of papers, making it a versatile choice for sticker printing.
4. Brother DCP-J4120DW - This is a compact, yet powerful, all-in-one printer that's capable of printing up to A3 size. It has wireless capabilities, high printing speeds, and the ability to print on various types of media, making it ideal for sticker printing.
This Brother printer also has separate cartridges for each color, which can save money in the long run.
5. HP ENVY 6055 - This all-in-one printer offers the ability to print, scan, and copy. With automatic two-sided printing and self-healing Wi-Fi, the HP ENVY 6055 is a convenient option for home use. It also supports HP's Instant Ink service, which can be a cost-effective way of managing ink supplies.
Please note that prices and features can vary, and it's important to confirm that these printers fit within your budgetand meet your specific needs before making a purchase.
Also, remember that the ongoing costs of ink can sometimes be more significant than the upfront cost of the printer, so consider this in your budgeting as well.
Recommended ink for printing stickers
Selecting the best ink cartridges for printing stickers at home depends on the printer model you have.
However, as a general rule of thumb, it's often recommended to use the original manufacturer's cartridges for optimal print quality and reliability.
Here are some specific brands and models:
1. HP Original Ink Cartridges - Depending on your HP printer model, cartridges like HP 63, HP 65, and HP 902 are all highly praised for their quality.
2. Canon PG/CL Series - For Canon printers, the PG-245XL/CL-246XL and PG-260/CL-261 are known for their reliability and good color reproduction.
3. Epson DURABrite Ultra Ink - This line of cartridges, including the T220 and T702 series, offers sharp text and vibrant colors, and the ink is also smudge, fade, and water-resistant, which is beneficial for stickers.
Remember, always ensure that the ink or toner cartridge you're purchasing is compatible with your specific printer model.
If you're planning to produce stickers that will be exposed to water or UV light, consider using cartridges with pigment-based inks.
They are more durable and fade-resistant than dye-based inks, which makes them more suitable for stickers.
However, dye-based inks might offer better color vibrancy.
Always run a test print before proceeding with a full print run to make sure the color and quality meet your requirements.
3. Sticker Paper

Selecting the right sticker paper is crucial for achieving the best print quality for your stickers.
Here are some highly-rated options:
1. Online Labels Weatherproof Matte Sticker Paper - This is a high-quality option that provides durability and a professional matte finish.
The weatherproof feature means these stickers can withstand exposure to elements like rain or sun, making them perfect for both indoor and outdoor use.
2. Milcoast Matte Waterproof Tear Resistant DIY Water Bottle Labels - These stickers are made from quality, adhesive material that is both waterproof and tear-resistant.
They are particularly good for labels on water bottles or other containers that might get wet.
3. Avery Printable Sticker Paper - Avery offers a range of sticker papers that are excellent for various uses. Their printable sticker paper comes in a matte white or glossy clear finish and is known for its high-quality print results.
4. J AND J PACKAGING Vinyl Sticker Paper for Inkjet Printers - This waterproof sticker paper has a glossy finish, providing bright and vibrant print results. It's great for heavy-duty stickers due to its durable vinyl material.
5. Royal Elements Waterproof Sticker Paper - This brand offers both matte and glossy finishes. Its waterproof feature makes it an excellent choice for stickers that might be exposed to moisture.
6. Neato Blank Full Sheet Labels - These are high-quality vinyl sticker sheets. They are water-resistant and have a glossy finish, making your stickers look professional.
Remember, it's essential to choose the right type of sticker paper that's compatible with your printer (inkjet or laser).
And always make sure to adjust your printer settings to match the type of paper you're using for the best print quality.
Lastly, it's often a good idea to do a test print before you start your main print job to ensure everything looks as expected.
4. Cutting Tools

When it comes to cutting stickers, there are several tools you can use depending on the scale of your project, the level of precision you need, and your budget.
Here are some of the best tools for cutting stickers:
1. Scissors - Good for simple projects and quick cuts. They offer a high level of control, especially for intricate details, but may not be the best choice for large quantities or for very precise, repeated shapes.
2. Craft Knife/Exacto Knife - A craft knife is ideal for precision cuts, especially for complex or intricate shapes. When used with a cutting mat, it allows for a high level of detail but can be time-consuming for large quantities.
3. Rotary Cutter - Similar to a pizza cutter, a rotary cutter is great for straight lines or gentle curves. It's ideal for cutting rows and columns of stickers quickly and precisely.
4. Paper Trimmer - A paper trimmer is a handy tool if you're cutting a lot of straight lines. It's ideal for cutting rows or columns of stickers with speed and precision. They come in different sizes, from small portable trimmers to large tabletop versions.
5. Die Cutters - Die cutters are good for cutting specific shapes repeatedly. Manual die cutters involve a die which is a shaped blade, and the paper is cut into this shape when the die is pressed onto it.
This is more suitable for large-scale, repetitive projects and is common in commercial settings.
6. Digital Cutting Machines (like Cricut or Silhouette) - These machines use a small blade to cut designs that have been digitally created or uploaded. They are perfect for high-detail stickers and large quantities, as you can reproduce the same design precisely every time.
These machines can cut a variety of materials, including vinyl and cardstock. They are a more expensive option, but invaluable for serious crafters or small businesses.
7. Commercial Grade Cutters/Plotters (like Roland or Graphtec) - These are used in commercial or industrial settings for high-volume sticker production.
They function similarly to digital cutting machines but are designed to handle larger quantities and longer continuous operation.
Remember, safety first! Always use a cutting mat to protect your surfaces, replace blades as they become dull (as they can cause imprecise cuts or be a safety hazard), and be mindful of your fingers when cutting.
5. Clear Spray (optional)
Clear spray sealants are often used to add an additional layer of protection to printed stickers, especially those that will be used outdoors or in high-wear situations.
Here are some of the types of clear sprays that you can use for sticker printing:
1. Acrylic Sealer Spray - This spray adds a protective, clear, non-yellowing, weatherproof coating that also provides UV resistance.
It is available in different finishes such as gloss, satin, and matte. It's often used for protecting paper, wood, metal, and plastic materials.
2. Polyurethane Clear Spray - Polyurethane sprays are known for their durability and resistance to water, making them ideal for outdoor stickers.
These sprays also resist yellowing from the sun, so your stickers' colors remain vibrant. However, polyurethane sprays may not be the best choice for flexible materials as they can become brittle when dried.
3. UV-Resistant Clear Spray - These sprays are designed specifically to protect against fading due to sun exposure.
If your stickers will be used outdoors and exposed to a lot of sunlight, a UV-resistant spray can help maintain the colors.
4. Clear Enamel Spray - These are hard, durable, clear coatings that can be used to seal stickers. They dry to a very smooth finish and are often used for sealing art projects due to their strong protective properties.
5. Clear Lacquer Spray - This is a protective spray that dries hard and shiny. It's not typically used for paper but can be useful for sealing stickers made from vinyl or other plastic materials. It's also quick-drying compared to some other options.
Remember that it's important to apply any clear spray in a well-ventilated area and allow adequate drying time between coats for the best results. Always follow the manufacturer's instructions on the spray can.
Designing Your Stickers

Creating a compelling sticker design is as crucial as the print quality as it's where you'll define your concept and start bringing your idea to life.
Here are some steps to help you design your perfect sticker.
1. Find Inspiration - Before you even start sketching, look around for inspiration. This can come from anywhere – an interesting pattern, an object, a piece of artwork, a cool font you've seen, etc.
You can also find inspiration from existing stickers, or designs on platforms like Pinterest, Instagram, or Dribbble. Collecting and organizing these ideas will help you form your design direction.
2. Define Your Concept - Once you have some inspiration, it's time to define your concept. What is the purpose of the sticker? Is it to promote something, or is it purely decorative? The purpose of your sticker will help guide your design decisions.
3. Sketch Your Idea - Begin sketching out your ideas on paper. Don't worry about making it perfect; the aim of sketching is to get a general outline of your design.
Focus on the size and positioning of the elements in your design. Experiment with different compositions and see what looks best.
Use pencil so you can easily erase and revise as necessary.
4. Add Detail - Once you are satisfied with the basic layout, you can add more detail to your sketch.
This can include shading, textures, color suggestions, or detailed aspects of your design elements.
5. Consider Colors and Shapes - You might want to start considering the colors you plan to use. You can add color to your sketch using colored pencils or markers.
Additionally, think about the overall shape of your sticker. It could be round, square, rectangular, or a unique die-cut shape that follows the contours of your design.
6. Size of the Sticker - You'll want to consider the final size of the sticker. Will your design still look good when it's shrunk down to sticker size? Make sure all elements and text are clearly visible.
7. Seek Feedback - If you have the opportunity, seek feedback on your sketch from others. Sometimes a fresh pair of eyes can spot something you missed, or offer a perspective you hadn't considered.
Remember, your initial sketches are just the starting point. As you move your design to your digital platform, you can continue to refine and adjust your design as needed.
Printing Your Stickers

Once your design is ready, it's time to print!
Choosing the right paper
Choosing the right paper and sizes for sticker printing at home depends on several factors.
Here are some considerations:
1. Type of Printer - The type of printer you own, whether it's inkjet or laser, will dictate the kind of sticker paper you can use. Make sure to purchase sticker paper that is compatible with your specific printer type.
2. Durability - If your stickers will be exposed to elements like water, sunlight, or wear and tear, consider using a more durable material, like vinyl sticker paper.
If your stickers will only be used indoors and don't need to be waterproof, you can use cheaper options like matte or glossy paper.
3. Finish - Sticker paper comes in different finishes. Matte sticker paper has a dull, non-shiny finish, which can make colors appear more saturated.
Glossy sticker paper has a shiny finish that can make colors appear brighter. Clear sticker paper is another option for a unique, see-through effect.
4. Adhesive - Consider if you need stickers to stick permanently or if you want them to be removable without leaving a residue.
Some sticker papers come with a strong adhesive backing that's not meant to be removed, while others have a lighter adhesive for temporary application.
Choosing the Right Size
1. Purpose of the Sticker - The purpose of your sticker will heavily influence its size. If it's a product label, it needs to fit the product's packaging.
If it's a bumper sticker, it should be large enough to be seen from a distance. Small stickers might be suitable for decoration or planner use.
2. Design Elements - Make sure all design elements and text will be clear and readable at the size you choose.
A design that looks good on your computer screen may not look as good when printed in a smaller size.
3. Printer Capabilities - Home printers typically accommodate up to A4 or US Letter size paper (8.5x11 inches), so your sticker sheet needs to fit within these dimensions. You can fit multiple stickers on one page, and cut them out individually.
4. Cost - Larger stickers will be more expensive to produce as they use more ink and paper. If you're making stickers for sale, you'll need to find a balance between the cost to production and what customers are willing to pay.
Remember, it's always a good idea to do a test print on regular paper before printing on your sticker paper to ensure that the size, color, and design are all to your liking.
The best resolution for printing stickers at home
The resolution of an image is defined by its DPI (Dots Per Inch), which refers to the amount of ink dots the printer will place in one inch of the paper.
A higher DPI value means more detail and clarity. For high-quality sticker printing, the recommended DPI is typically 300 or higher.
Here's a basic table that outlines the relationship between DPI and print quality:

Remember, while a higher DPI generally results in a better quality print, it also creates a larger file size. Always ensure that your computer and printer can handle the increased data.
In addition, it's important to note that increasing the DPI of an image that was created or saved at a lower DPI won't improve its quality. Always start your design at a high resolution.
Cutting and Finishing
1. Cut out your stickers
Carefully cut out your stickers. If you're using a craft knife, make sure to use a ruler
for straight lines.
2. Apply clear spray (optional)
If you want your stickers to be water-resistant, spray a light coat of clear acrylic sealer onto them. Let them dry completely before using. And voila, your stickers are ready to use or sell!
Conclusion

Printing stickers provides a plethora of creative possibilities for individuals, businesses, and artists alike.
For personal expression, custom sticker designs allow individuals to showcase their personality and creativity.
Whether it's a favorite quote, an original artwork, or a representation of one's interests, stickers offer a tangible way to personalize belongings, such as laptops, water bottles, or notebooks.
Sticker collages, where multiple stickers are creatively arranged, can be used to create visually striking compositions.
In the realm of branding and marketing, stickers play a vital role. Promotional stickers featuring logos, slogans, or QR codes can be strategically placed on various surfaces to expand brand reach and visibility.
Stickers can also enhance product packaging, adding a touch of visual appeal and reinforcing brand identity.
Additionally, stickers can be utilized as merchandise, creating collectibles that foster brand loyalty.